Survivor Filter Pro Review Portable Water Filter
Is the Survivor Filter Pro Really the Ultimate Budget Portable Water Filter in 2025?
The Survivor Filter Pro is one of the latest creations of the US company – Survivor Filter™.
In essence, this is a portable water filter that was designed to treat a few more litters of fresh water faster than other competitors (such as the Lifestraw Go model) in the same category.
At first glance, this filtration system looks very versatile and ideal for outdoor adventure. Nevertheless, there is a lot to discuss to define its qualities and improvements.
At the end, we know that this Survivor Filter Pro™ review is going to give you enough details to help you invest or not in this filter.
Survivor Filter Pro Tech Specs
[table id=34 /]
What to Consider Before Buying the Survivor Filter Pro
Before deciding if this filter pump is good enough for your needs, you should review the following points.
Pollutants removed by this portable device
As most portable water filters, they have been designed to remove living micro-organisms and chemicals present in the surface water.
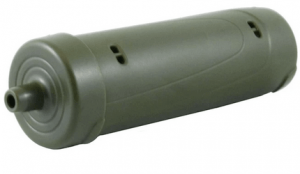
But, to understand the efficiency of this Survivor portable model, we should discuss the filters and stages involved:
- Stage 1: Pre-filter
The aim of this pre-filter is to remove most common bacteria types such as giardia, e-coli, protozoa among others.
To do this, it is required to have a 0.1 micro filter.
Even though, removal of total dissolve solids (TDS) is not mentioned, this stage will most likely to reduce the TDS concentration and leave other larger particles out of reach to stage 2.
This Pre-filter (membrane) was designed to treat up to 100,00 lts of water.
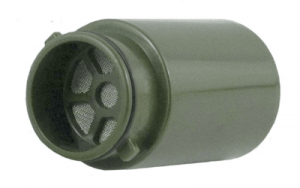
- Stage 2: Carbon Filter
Some surface water sources may have also other compounds present in there. This is where the carbon characteristics will reduce the concentration of most heavy metals, pharmaceuticals and possibly semi-volatile hydrocarbons.
The carbon filter will treat up to 2,000 lts of water. I would suggest to have a spare one to keep up with the other two (2) filters.
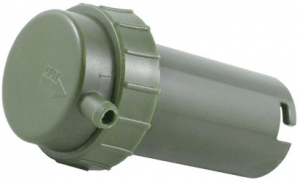
- Stage 3: Ultra Filter
Smaller micro-organisms such as viruses and staphylococcus sometimes are able to sneak thru the filtration process.
This last stage is crucial to ensure the water you filter is safe to drink.
The ultra-filter was made with 0.01 micron pores to ensure the above is done.
Similar to the stage 1 filter, this one will handle 100,000 lts of water too.
Based on the above filtration process, I would say is good enough to ensure the removal of most dangerous contaminants in surface fresh water.
Nevertheless, if you have additional time after filtering and want to maximize the quality of the water, couple more things you can do:
- Boil the water to kill most bacteria.
- Expose the water to the Sun UV light, which usually kills other viruses.
Portability and comfort
This outdoor water filter is neither the smallest nor the biggest device to carry.
Basically, its dimensions are 3.2″ x 2″ x 6.5″ (8 x 5 x 16 cm). I think this is a very compact device considering the setup of the three (3) filtration stages.
Off-course, if you are planning to do a small hiking, you would still be able to bring it to your trip, however, consider a smaller device such as the Sawyer Mini for comfort.
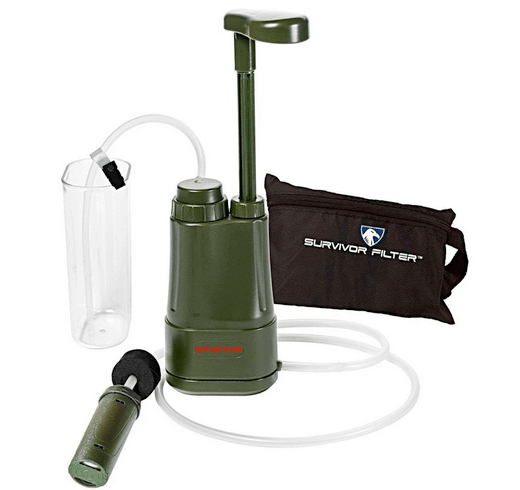
One thing that I really like is the carry bag that comes along with the filter. Why? As you can see, the Survivor Pro comes with a few elements so you would want to access all pieces at once.
Also, it will keep it clean and easy accessible when you need it.
How to Setup, Operate and Maintain the Survivor Filter Pro
Part of your filtration system’s life is to know how to operate it and maintain it. I know, it looks simple but there are things to look before every usage.
Setting up the system
When you buy the Survivor Filter Pro, it will come completely assembled.
The only thing you have to do is to connect the pre-filter hose to the lower intake point and connect the outlet hose to the top one.
Lastly, use the little clip to attached it on the clear plastic container or any other suitable one.
Operation
Once you have all pieces together, the operation is simple.
There are two (2) alternatives to filter water:
- Alt 1: Placing the intake end (the pre-filter) directly into the water source or,
- Alt 2: Filling up a separate jar with non purified water, then putting the intake into it.
Regardless of the way you do it, you will do the same process of pumping but there is a big difference between the two options.
- Alternative 1:
Putting the intake is easy, thanks to the one (1) meter long silicone hose. This technique is very useful if you can’t have easy access the water source in a safe way (eg: soft edges).
The only problem I see with this alternative is that you will need to submerge it deep enough to pump water and at the same time, not to submerge it into the mud.
Sucking water from a very muddy point could clogged the pre-filter in no time.
Luckily the intake hose has the float device attached to it, precisely to avoid mud.
- Alternative 2:
If you have easy access to the water stream, the best option is to fill up a jar then filter from there.
This is recommended since 1) you can take water from the very surface (less sediments) and 2) you won’t have to deal with the inlet getting submerged into the mud.
Lastly, be gentle when pumping water. Sometimes you will need to put extra pressure to push water thru the system, meaning more pressure over the handle. It looks a weak and jiggles a bit.
Maintenance and cleaning
As any other element you use for personal matters, this portable water filter must be kept clean after every use.
- Filters
You know by now how many litters each filter can treat before being replaced, but this lifespan is only possible if you do the “backwash” process.
There is two (2) ways to remove clogging particles out of the filtration system:
1) Using a syringe: all you have to do is to attach the provided syringe to the outlet end of the pre-filter. Just push the clean water till it come clean form the other end.
2) Swapping the inlet / outlet hoses: in this case, you just need to connect the pre-filter in the outlet end. Just pump water as you would do normally.
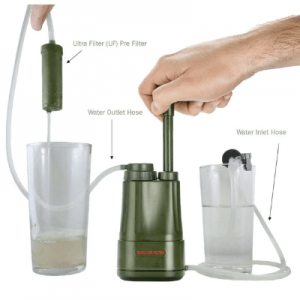
My advice is to do option 2 since this way you can purge the three (3) filters at once. Option 1 only is possible for the pre-filter.
Regardless of the method used, don’t forget to clean the other elements. This means running clean water thru the hoses too.
Lastly, before you put the Survivor Filter Pro away, make sure it is completely dry.
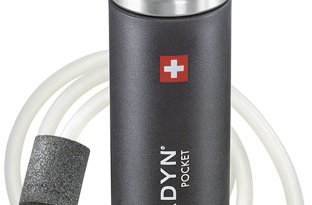
Survivor Filter Pro vs Katadyn Pocket
So far, the two (2) most renown portable water filters with a pump mechanism are the Survivor and Katadyn models.
This table shows the main differences between the two systems:
| Feature | Survivor Filter Pro™ | Katadyn Pocket (Read Review) |
| Flow rate (lpm) | 0.5 | 1.0 |
| Filters | Pre-filter (membrane), carbon and post carbon (membrane). | Pre Filter (membrane) and ceramic infused. |
| Filters lifespan (months) | N/A. Depends on usage. | |
| Filtered volume (lts) | 100,000 and 2,000 (carbon). | 50,000 |
| Dimensions | W: 2″; L: 3.2″; H:6.5″ | W: 2′; H: 9′ |
| Stages | 3 | 2 |
| Weight (g) | 362 | 538 |
| Quality of materials | Plastic made outer shell | Aluminum. |
| Warranty | Lifetime (conditions apply). | 20 years. |
Based on the above information, I would be incline to buy the Survivor model.
Survivor Filter Pro Review Wrap Up
This Survivor portable water filter model was built up to provide extra liters of water for long treks.
The long hoses are ideal for water sources that are hard to reach. In addition, their diameter is good enough to fill up a jar in less than a minute.
The each filtration stage have an important role when treating the pumped water. Regardless of the number of stages, I recommend you boil the water (if possible) or expose it to the UV. Just as an extra precaution.
The setup, operation and maintenance are very straightforward. The operation is just a simple hand pumping process. As regards to the maintenance, doing a backwash after every use (even if you use it 2 or 3 times a day) is recommended.
Based on my Survivor Filter Pro review, I would say this budget portable water filter has the technology and quality needed to deliver good quantities of drinkable water.
Images courtesy of Survivor Filter™
Purchasing Options
The current version of the Survivor Filter PRO, is currently available for purchase at Amazon.

